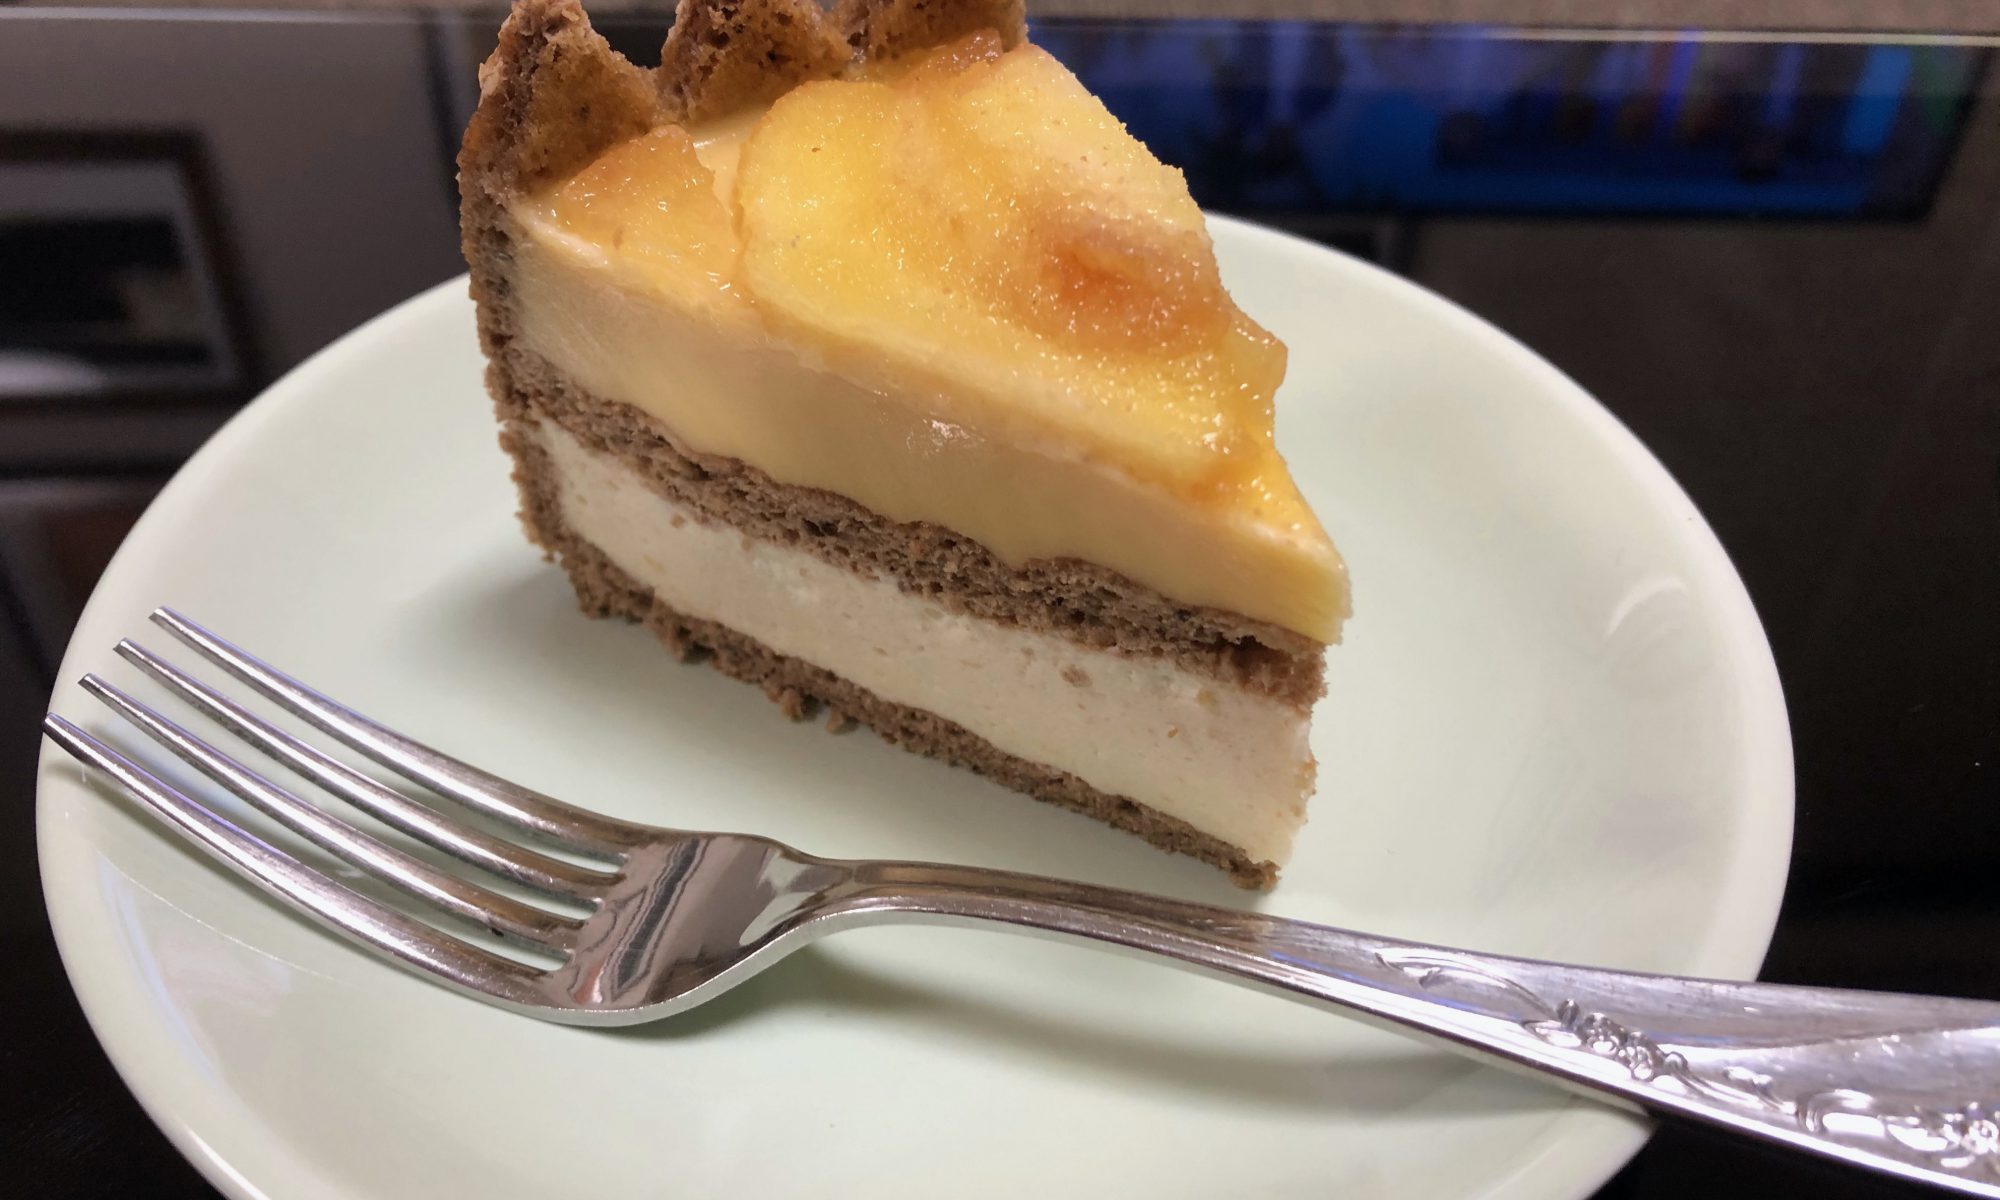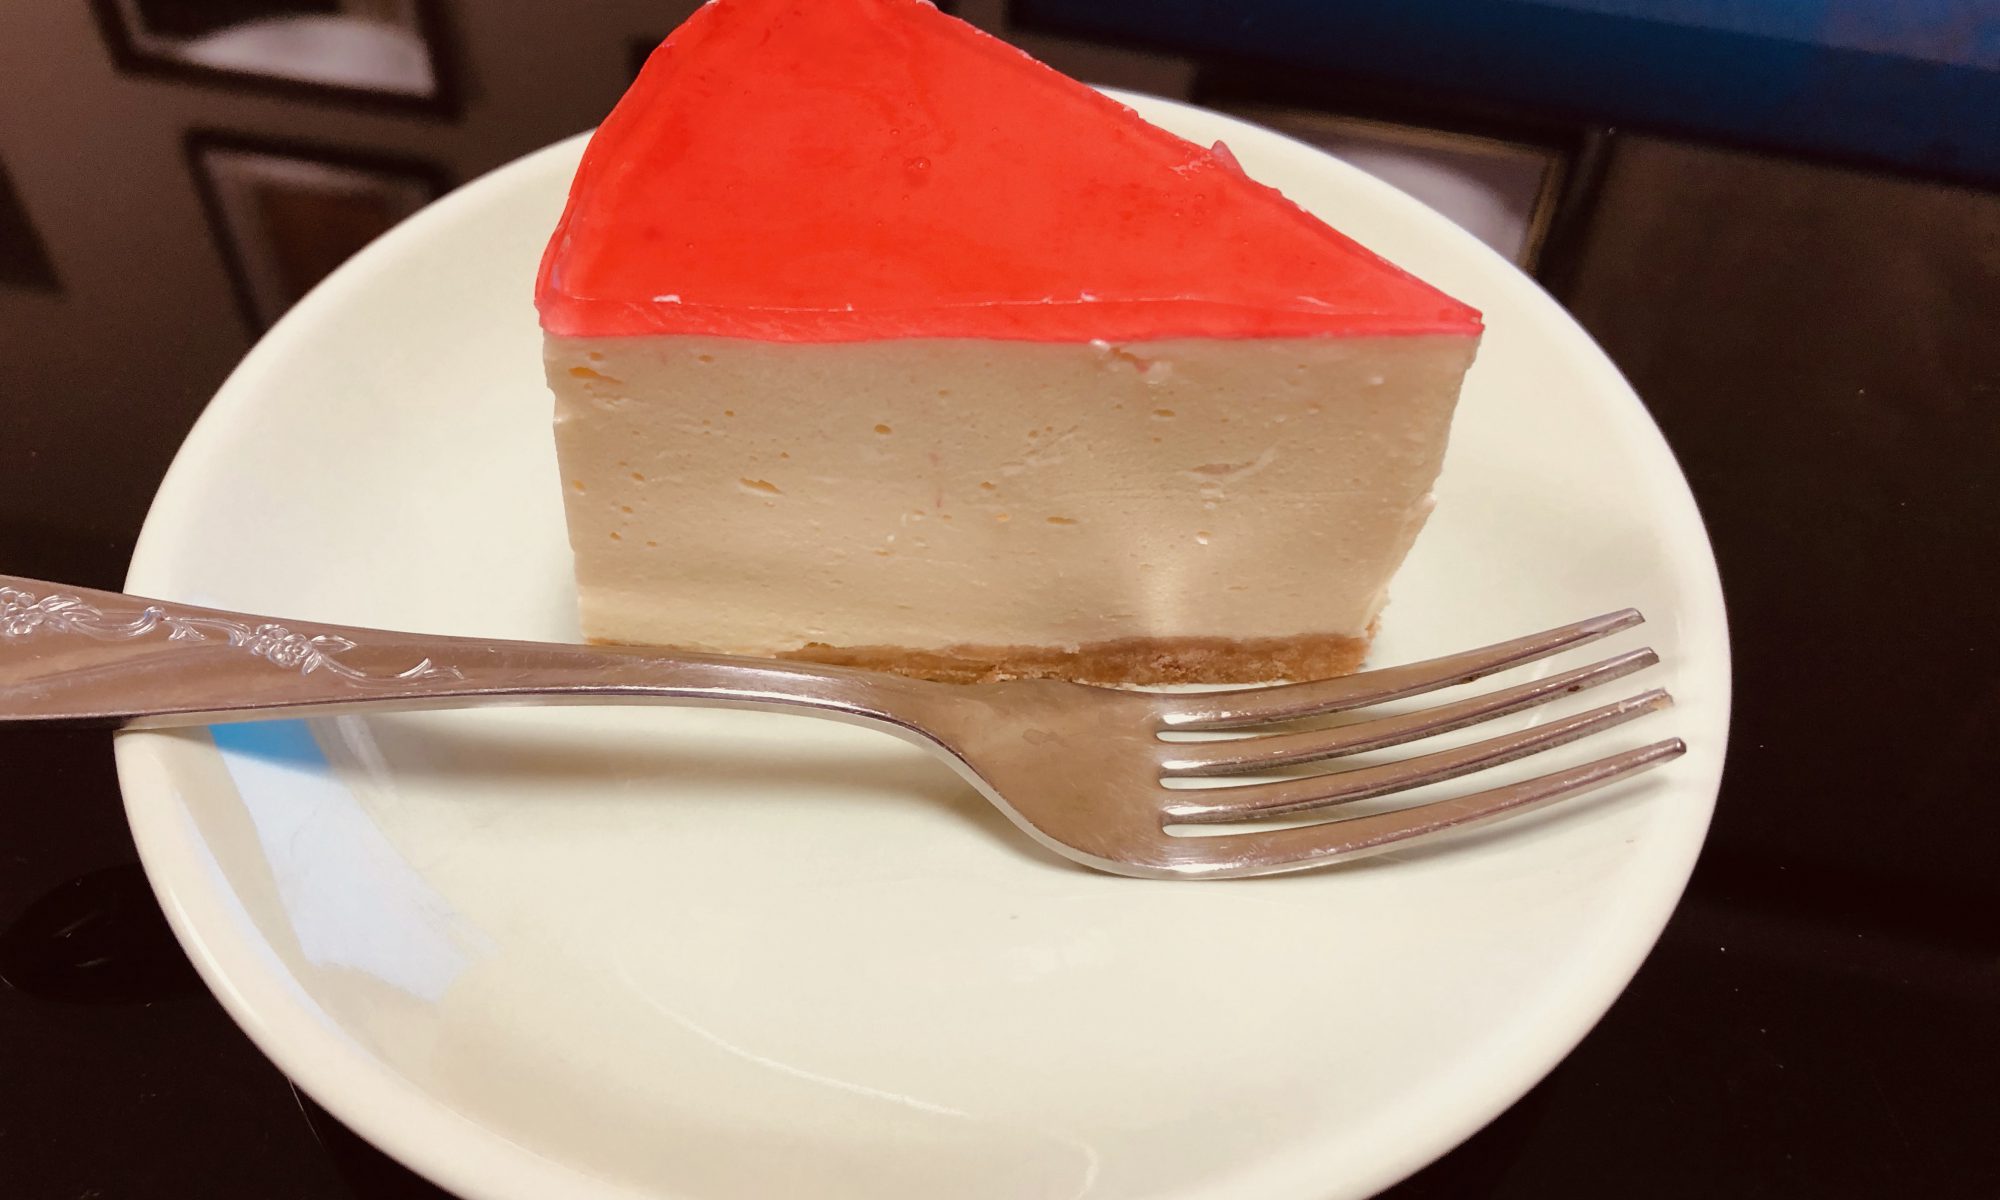
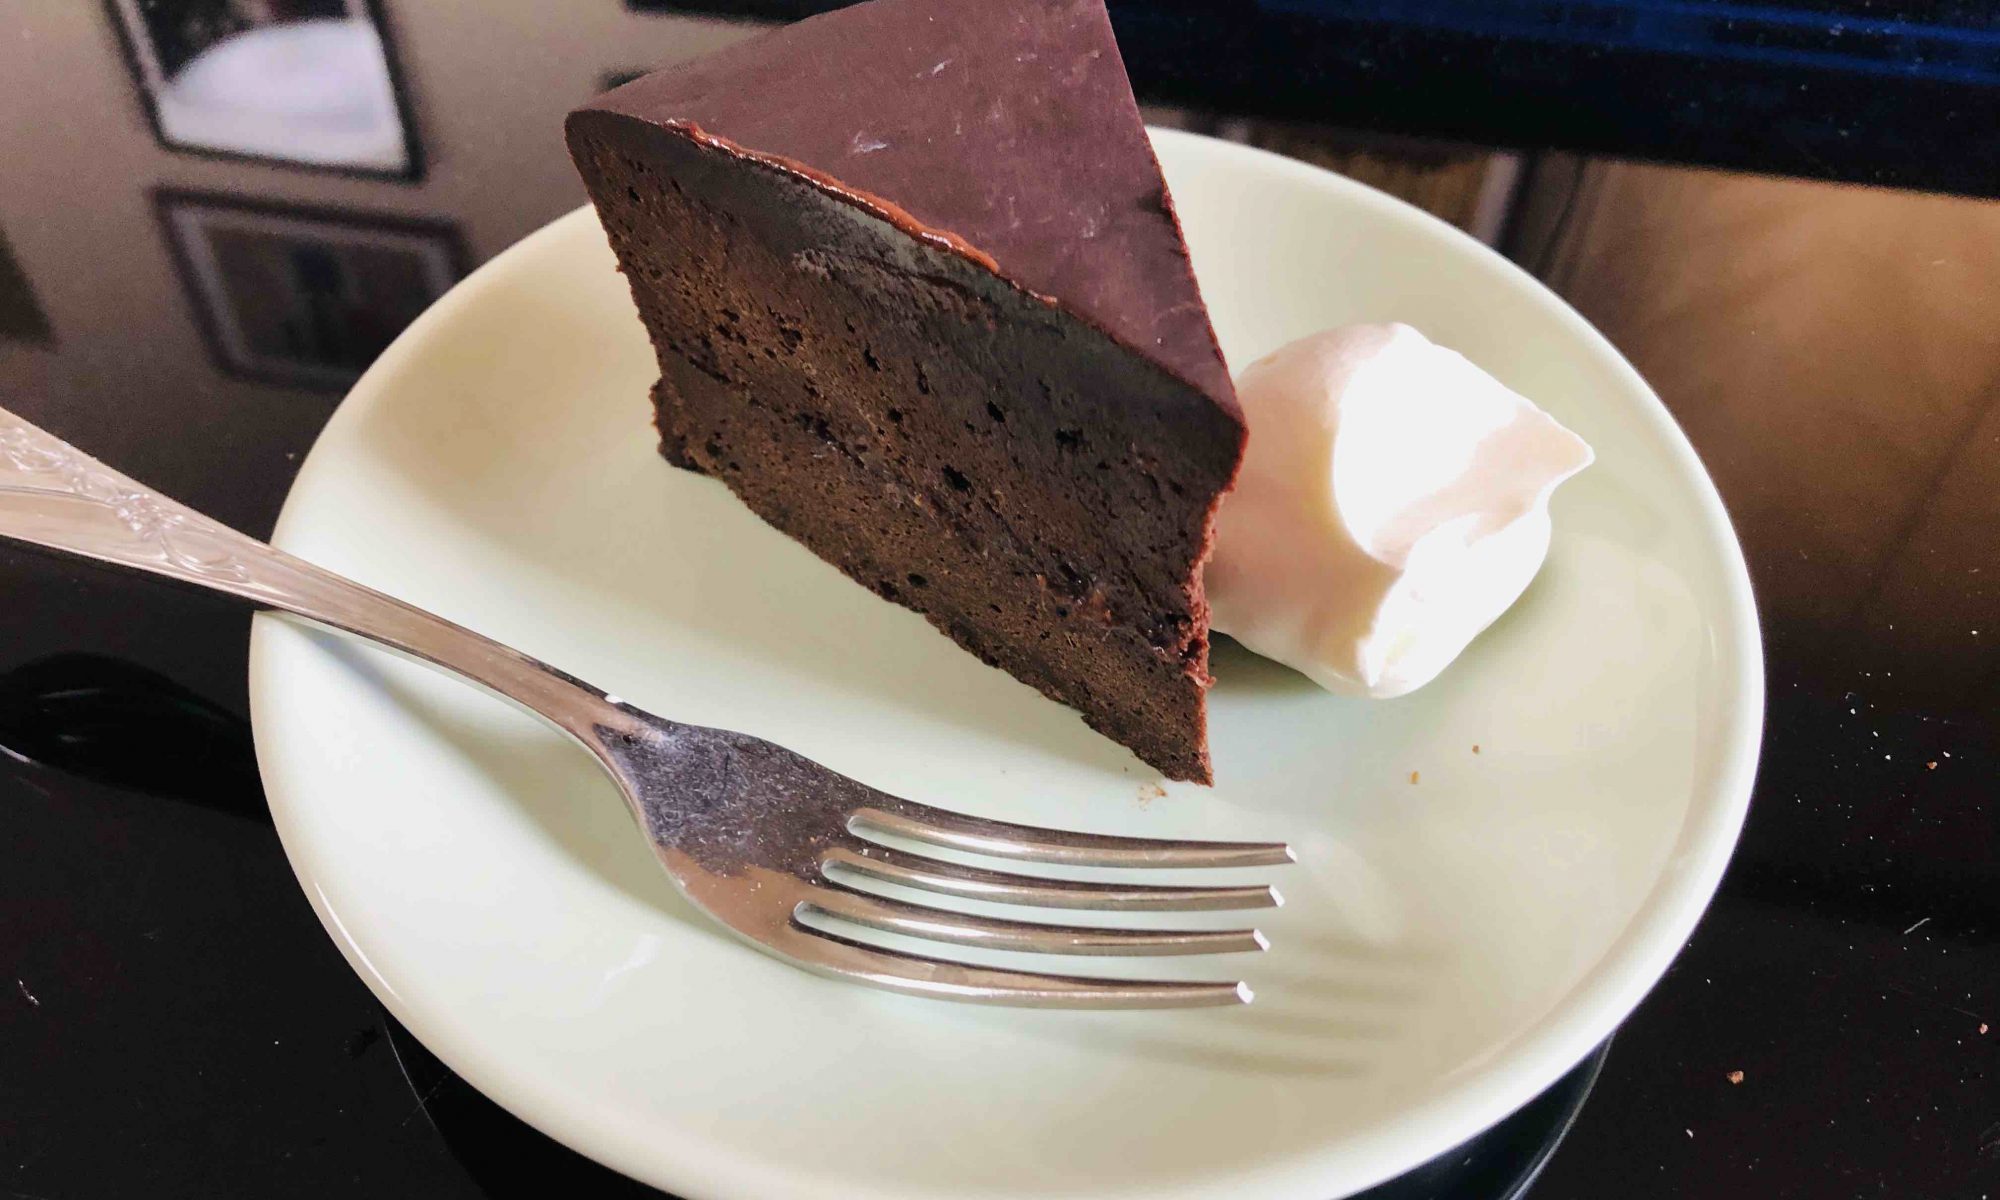
バレンタインデーも近いですので、普段あまり手を出さないチョコレートスポンジケーキの王道”ザッハトルテ”を作ってみました。”Modern French Pastry”には、”チョコレートが苦手だという者は、単に素敵なチョコレートに巡り合っていないだけだ”とある。ならばということで、”究極のストロングテイストの”大人味チョコレートケーキを”というコンセプトでホテルザッハー風のザッハトルテを作ってみました。
Ingredients: 材料と配合組成
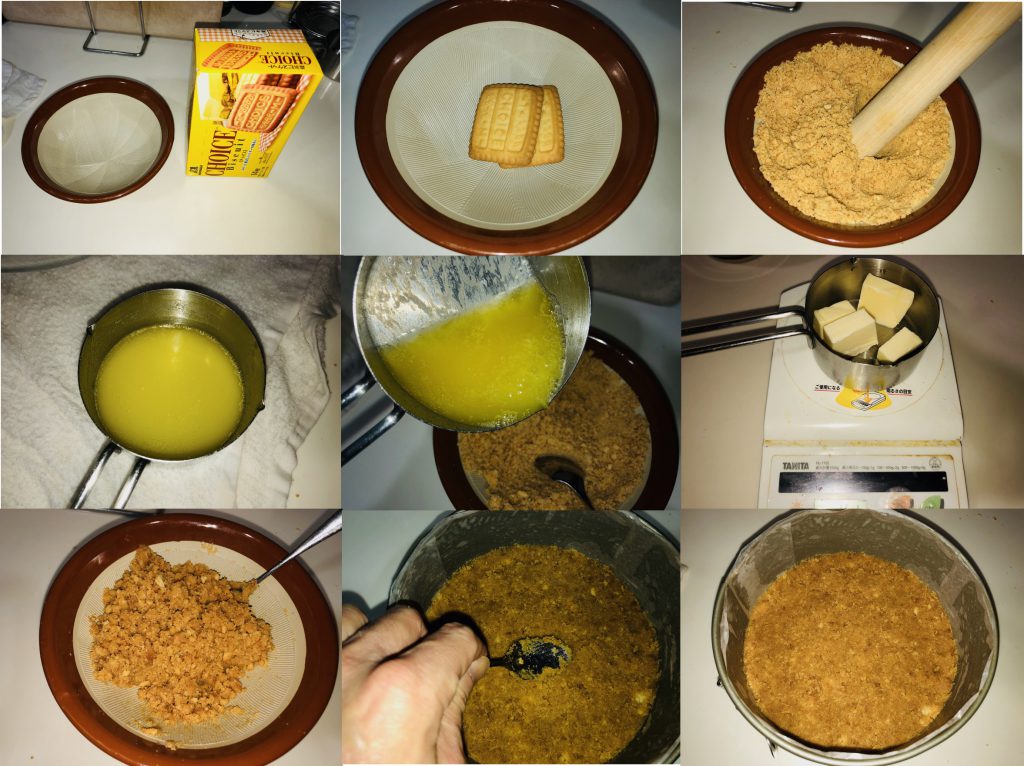
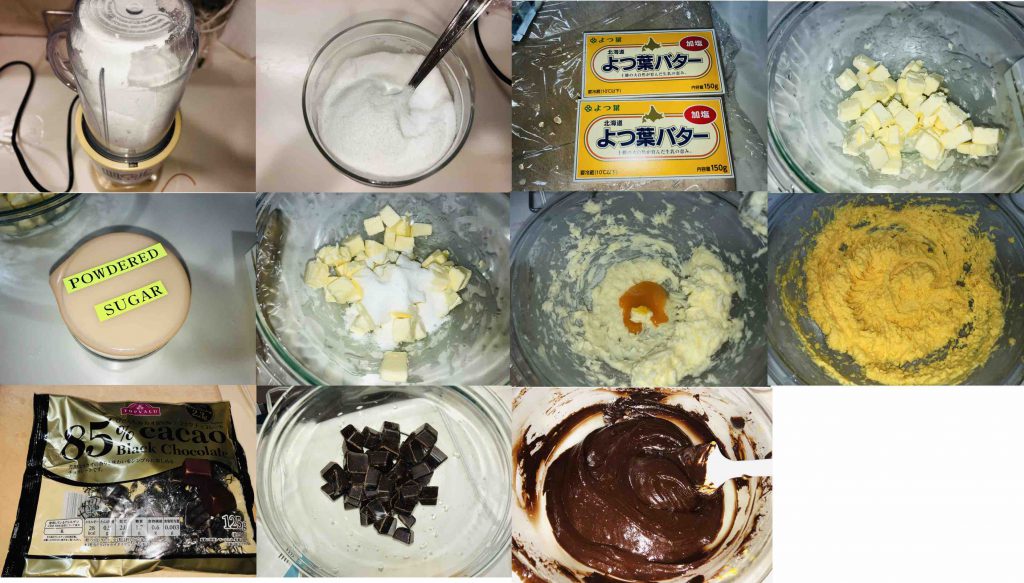
使用した材料は、苺(さぬきひめ:香川県産)、レモンジュース(100%レモン:サンキスト)、加塩バター(よつ葉バター:よつ葉乳業)、ダークチョコレート(ひとくちカカオ85%ブラックチョコレート:トップバリュー)、ココアパウダー(ピュアココア:VANHOUHTEN)でその他はいつもの材料です。
アプリコットジャムを使用するのがホテルザッハーのオリジナルレシピですが、今回はイチゴジャムを使ってみました。カカオのストロングテイストを満喫できる様にしました。
| Strawberry Jam | Amount |
| Fresh strawberry | 280 gram (2 pack) |
| Superfine Sugar | 105 gram |
| Lemon Juice | 6 gram |
| Sacher Chocolate Sponge Cake | Amount for φ18cm cake pan |
| Salted butter | 210 gram |
| Powdered Superfine sugar | 56 gram |
| Egg Yolk (M) | 8 ea. |
| Dark Chocolate | 210 gram |
| Cake Flour | 125 gram |
| Bread Flour (Strong Flour) | 60 gram |
| Pure Cocoa Powder | 25 gram |
| Egg White | 8 ea. |
| Powdered Superfine Sugar | 56 gram |
| White Wine Vinegar | 3 gram |
| Vanilla Oil | a few drops |
| Baking Trick | 170C x 40 minutes plus 180C x 10 minutes |
チョコレートグレーズは、丁度ひとくちカカオ85%ブラックチョコレートを3パックを使い切る量で作成したためギリギリ1回分のグレーズが可能な量になっています。流動性に乏しいため1回行ける印象ですが、コーティングをきれいに仕上げることを考えるとチョコレートの量を200グラムに増量して生クリームを混ぜでグラサージュにした方がいいかもしれません。
| Chocolate Glaze | Amount |
| Dark Chocolate | 165 gram |
| Powdered Superfine Sugar | 125 gram |
| Water | 75 gram |
Instructions: 調理法
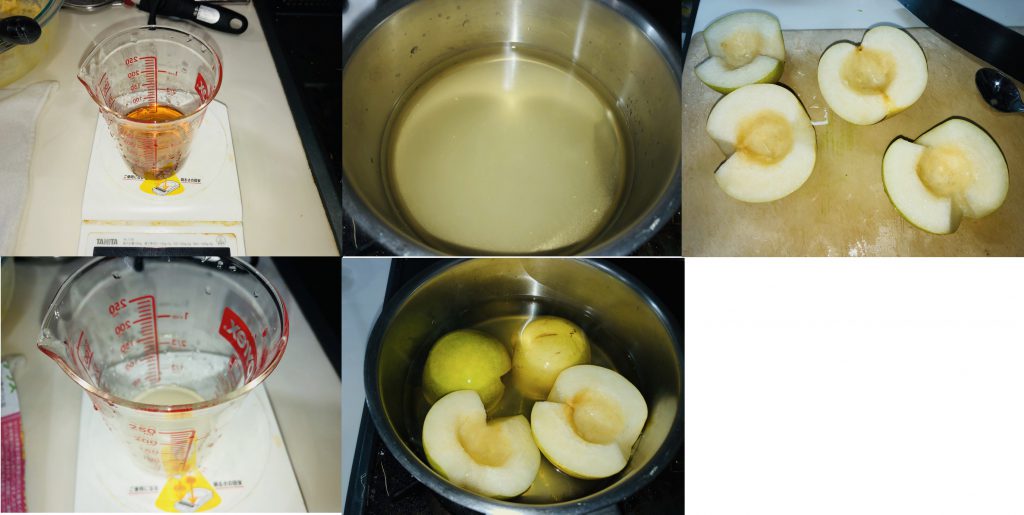
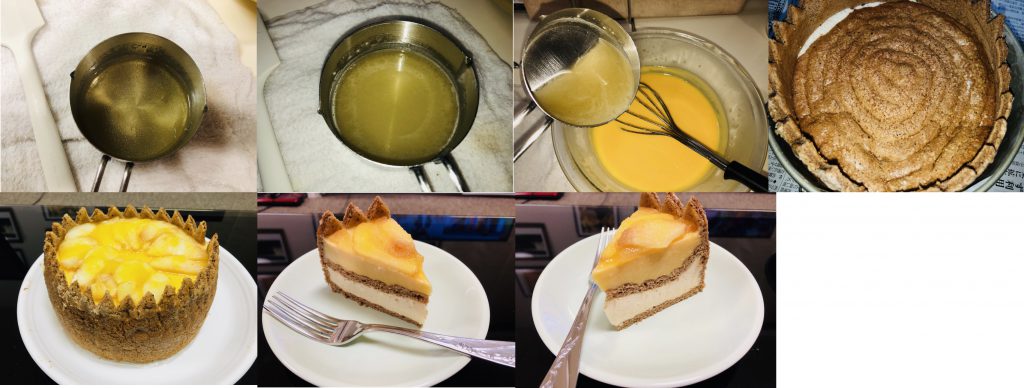
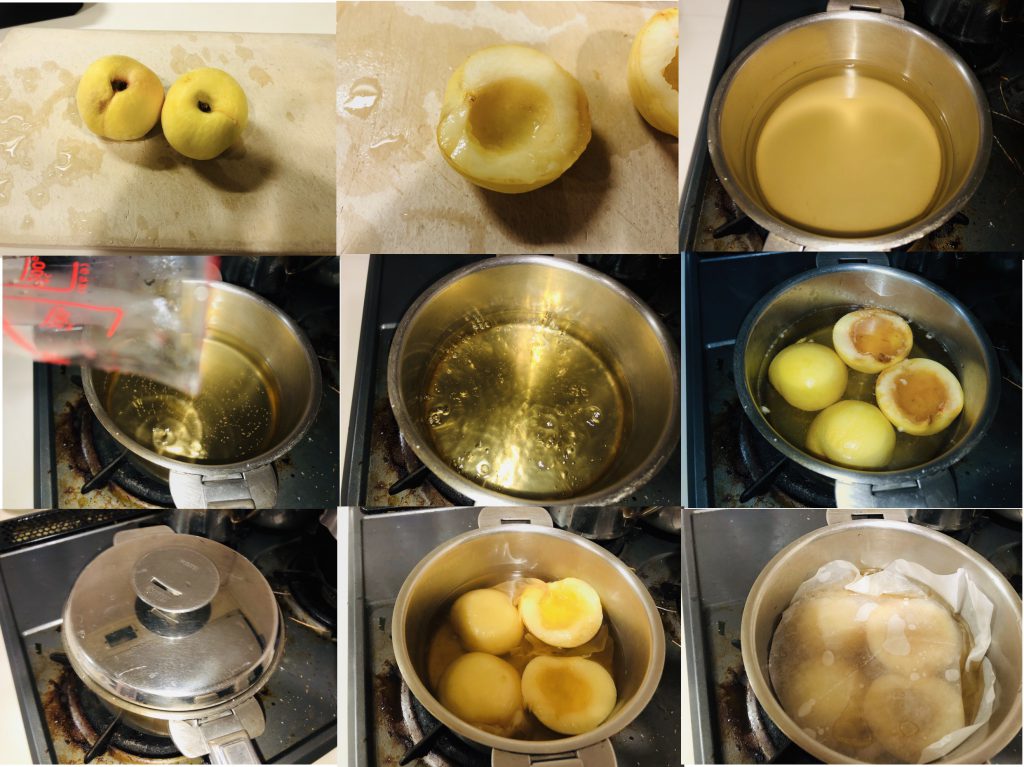
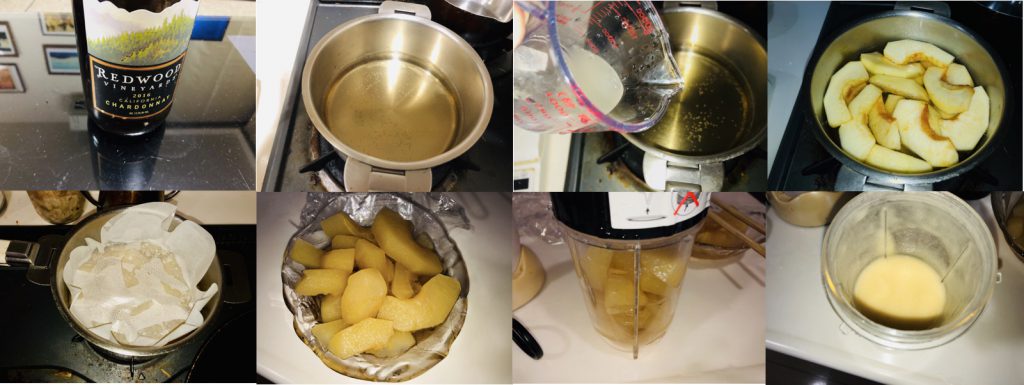
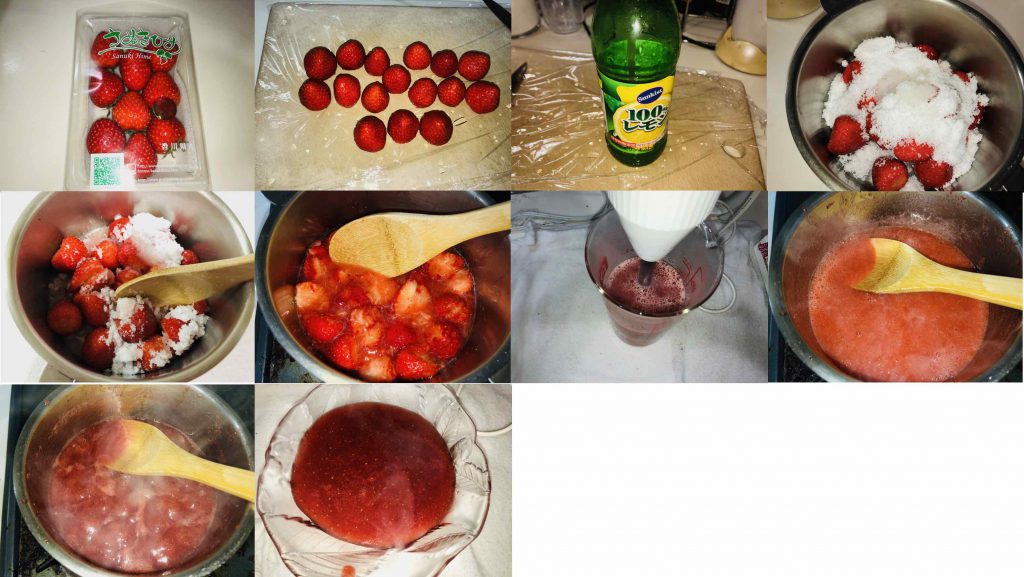
<1>ストロベリージャムの作成
ザッハートルテのスポンジケーキにはアプリコットジャムを挟むのが常道ですが、今回はストロングテイストな大人味をコンセプトに仕上げていますのでカカオの強さを十分堪能できるよう即席のストロベリージャムを作成しました。
①シチュー鍋にイチゴを280グラム(2パック分)入れ、上白糖を105グラム加えます。
②レモンジュースを6グラム加え、しばらく室温で放置、浸透圧でイチゴから果汁がしみだして来るまで待ちます。
③木べらでイチゴを適当につぶして、木べらで混ぜながら中火で加熱して煮ていきます。どんどんイチゴが柔らかくなってきます。ハンディーブレンダーできれいにクラッシュできるレベルの柔らかさが目標です。
④沸騰したら一度500mLの耐熱カップに移し、ハンディーブレンダーでピューレにします。これを行うことで煮込み時間を短縮できますのでペクチンを使用ぜすグレーズ用のジャムを作成できます。
⑤シチュー鍋に戻し中火で焦がさないように木べらで混ぜながら濃縮します。木べらを引いてみてなべ底が瞬間的に見える程度の粘度で完成です。これ以上濃縮すると苺ジャムらしくなってしまいますので注意が必要です。
⑥使用時まで冷蔵庫で冷やしておきます。
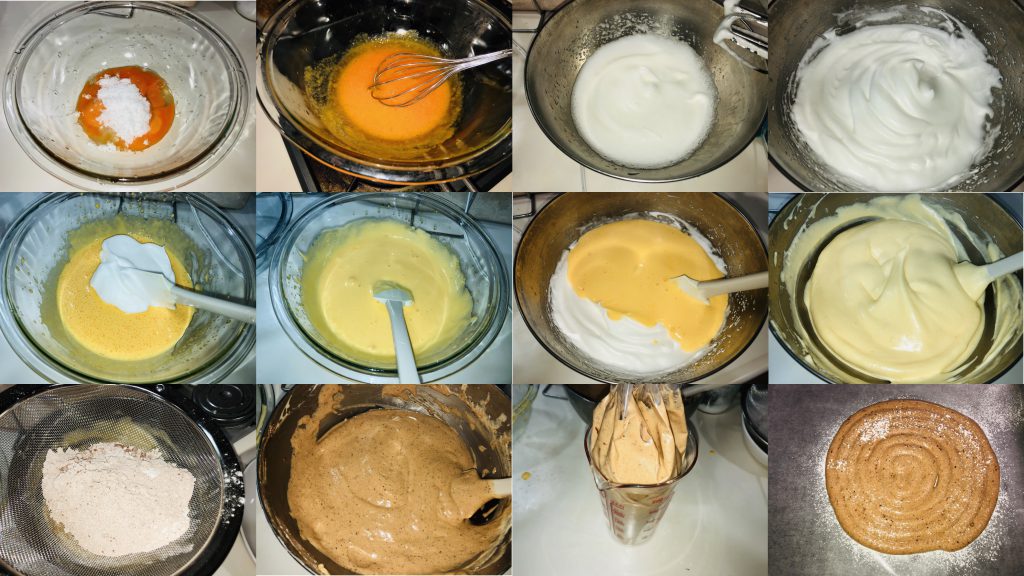
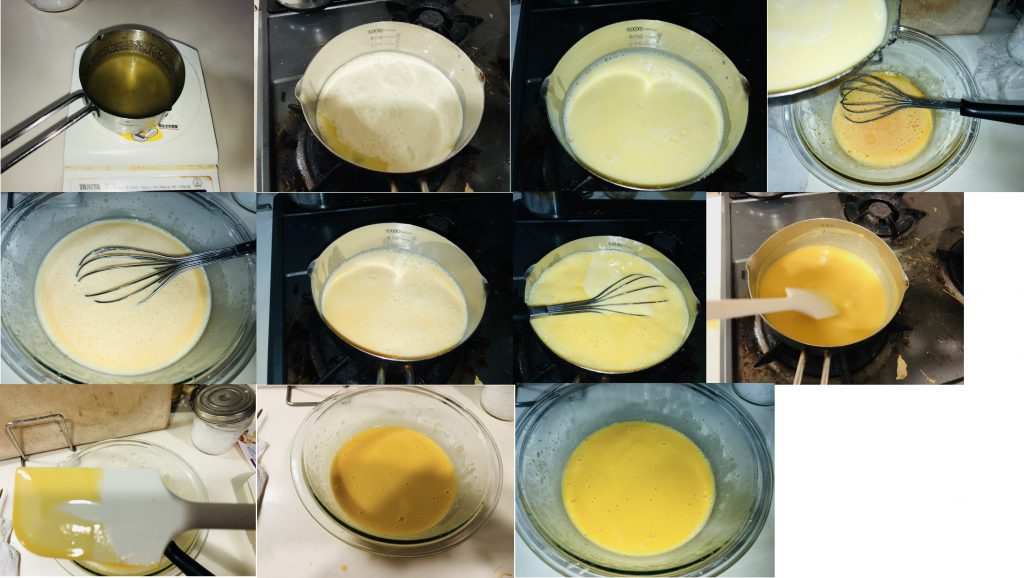
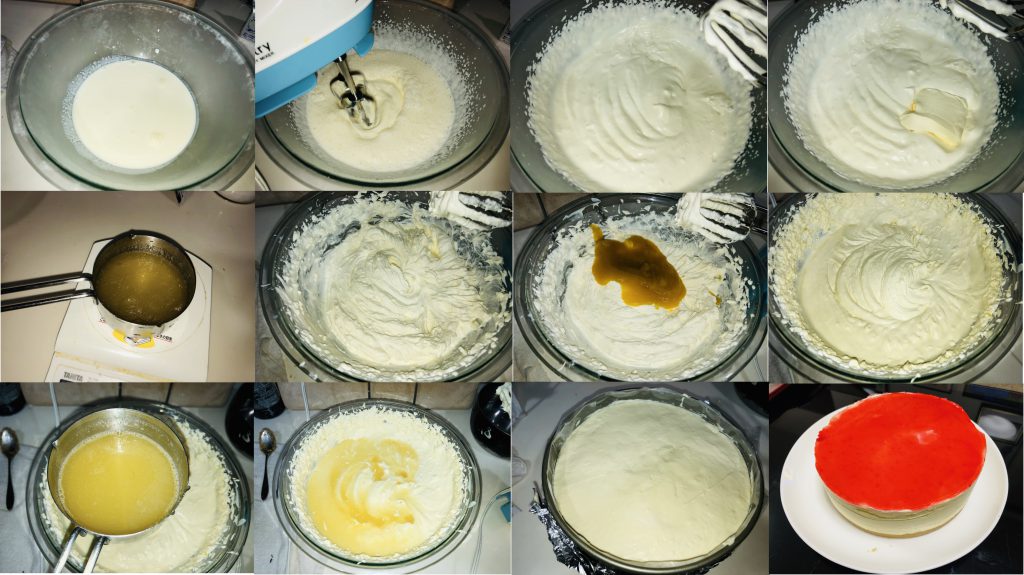
<2>ザッハースポンジケーキの作成
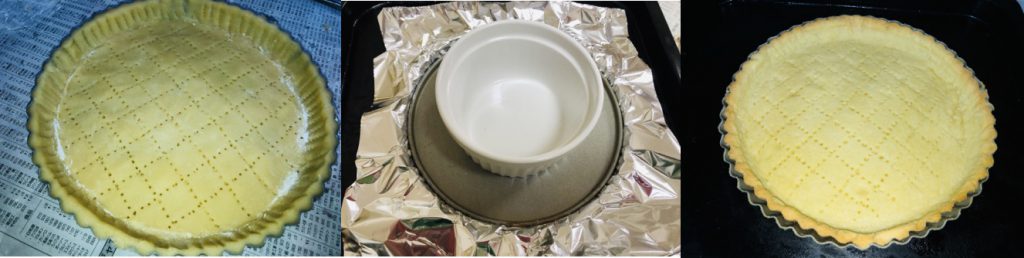
作成前に、φ18cmスプリングフォームケーキ型に市販のクッキングシートを貼り付けます。今回使用するバッターは非常に硬くて粘性が高いうえにケーキ型のほぼ上端まで入る分量になっていますので側面に貼るシートの高さは8cm位必要ですので注意が必要です(スフレチーズケーキの際と同様です)。オーブンを170℃で予熱しておきます。
また生地をメレンゲと混ぜるのが非常に困難ですのでメレンゲはsoft peakに仕上げます。soft peakメレンゲ作成のためあらかじめ粉砕上白糖を作成します。
①ミキサーカップに上白糖を入れてミキシングします。
②パウダー状になったら乾燥したカップに詰めます、上白糖はすぐに水分を吸収しますので粉砕上白糖は毎回使用直前に作成します。
③大ボウルにバター210グラムをキューブ状にカットして入れます。
④電動ホイッパーである程度クリーム状にします。粉砕上白糖を56グラムくわえて完全にバタークリームになるまで混ぜます。
⑤卵を卵黄と卵白に分けます。卵白は使用時まで冷蔵庫に入れておきます。卵黄をバタークリームに1個加えて電動ホイッパーで完全に混ざ込みます。この操作を8回繰り返してきれいに乳化した卵黄クリームを作成します。
⑤ダークチョコレート210グラムを耐熱ボウル(中)に入れて溶かします。方法はBain-marie(または電子レンジで約30秒)を用います。いずれしても85%ダークチョコレートは非常に油脂が少ないですので粘度が高くスパチュラで混ぜて均一にするのに少し難渋しました。全部解けきったら湯煎から外して少し冷まします。
⑥粘度が極めて高いチョコレート液になりますのでスパチュラで混ぜていて少し粘度が下がり始めたらすぐに卵黄クリームに投入して電動ホイッパで急いで混ぜ込みます。スパチュラでホールドしてみて均一に乳化できていることを確認します。
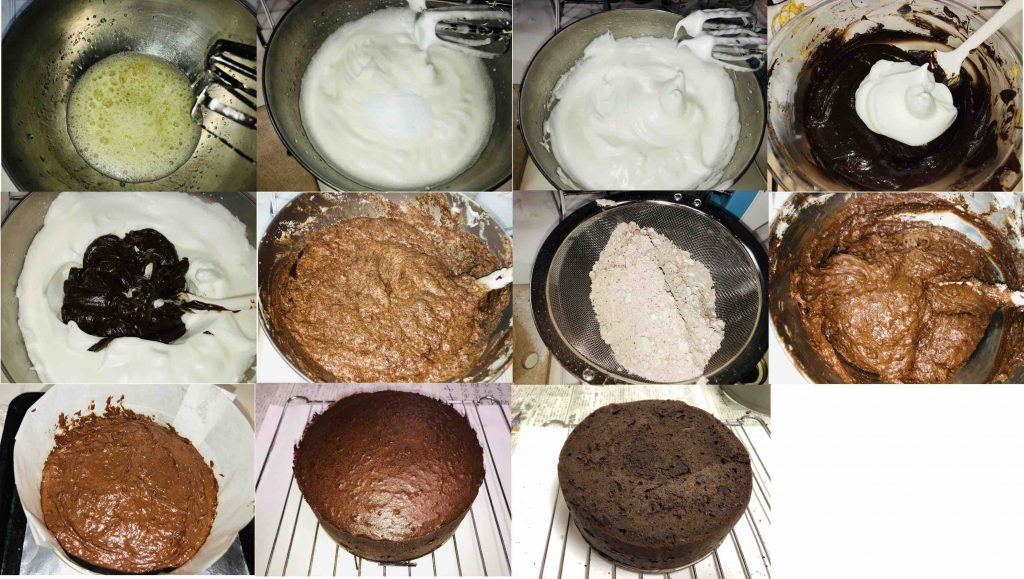
⑦メタルボウルに卵白8個分を入れ3グラムの白ワインビネガーを加えて電動ホイッパーで混ぜます。
⑧若干soft peak気味になったところで粉砕上白糖56グラムを2回に分けて投入し、電動ミキサーで攪拌してsoft peakメレンゲに仕上げます。メレンゲの硬度をこれ以上上げると粉類との混合が困難になりますので注意が必要です。
⑨go back methodに従いメレンゲを少量チョコ卵黄クリームに投入しスパチュラで丁寧に混ぜ合わせます。これをメレンゲボウルにもどします。丁寧にdown to up foldで均等になるよう混ぜ合わせます。この時香りの調整にバニラオイルを数滴滴下しておきます。
⑩薄力粉125グラム、強力粉60グラム、純ココアパウダー25グラムを一度別容器に篩い、フォークで均等になるように混ぜます。塊を極力減らすためにこれをチョコレートメレンゲの上から篩います。
⑪スパチュラで丁寧にcenter to margin & down to up foldしていきます。こんなものを本当に混ぜることが出きるのかと思える粘度ですが、丁寧に混ぜるとheavy volumeの超粘調バッターが完成します。
⑫用意しておいたケーキ型に生地を流し込み適度に表面を整えます。この粘度では内部大きな気泡を追い出すのは困難ですが何回かトントンと机の上にケーキ型を落として気泡を追い出しておきます。170℃で40分前後焼灼したあと、竹くしで中心まで焼成できたかどうか確認(予想通り不十分です)の後、180℃で焼成10分程追加して仕上げます。
⑬クーリングラックにおいて室温で冷めるのを待ちます。
<3>チョコレートグレーズの作成
今回のチョコレートグレーズはすぐに固まってしまうほど粘調ですので先にアッセンブリングを済ませてから最後に作成します。
①小型の計量鍋(またはシチュー鍋)に水75グラムと粉砕上白糖125グラムを入れて中火でボイルさせます。ボイルしたら火を止めます。
②80℃位に下がったところで、ダークチョコレート165グラムを全部投入しフラワーホイッパーで混ぜます。
③解けて均一混ざったら完成です。この時温度は69℃でした。
この後、通常はテンパーリングを行い、融点の30℃付近になったところでグレージングするのですが、今回のチョコレートでは流動性が低すぎて60℃を下回るとかなり流れが悪くなるようなのでスパチュラで流動性が悪くなったと感じたところでグレージングしていますので何℃でグレージングしたかは分かりません。

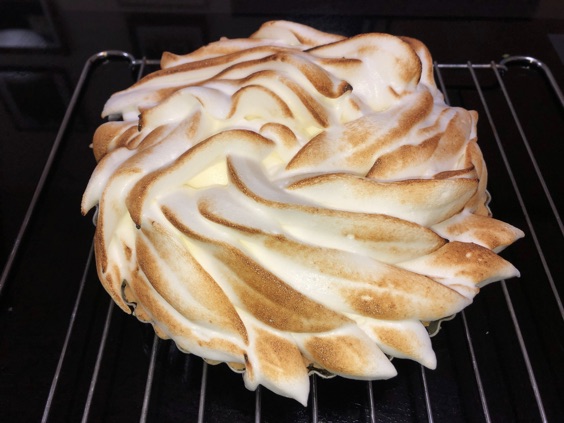
<4>アッセンブリング
スポンジケーキ最下面のテフロンプレートは最後に外すようにします。これは中心部へ熱の伝わりが悪いとあらかじめ想定される生地を焼くときの約束事項で、側面モールド解除後に生焼けが判明した時、再度焼成を追加することで成功に持っていくためです。
①スポンジケーキの上面をカットして水平にします。このとき中心部まで熱が伝わっているか目視でも確認します(もし中心部の焼きが甘い場合、このままもしくは、再度モールドを装着してオーブンで追加焼成します。大部分の場合、プラス10℃で10分位焼成すれば十分です)。
②1/2の高さでカットしてスポンジケーキを2分します。ここでも問題なければひっくり返して下面のプレートとクッキングシートを剥がします。
③前もって作成したグレーズ用のジャムを下段のケーキの表面に十分塗ります。
④残りのカットした対になるスポンジケーキを乗せます。表面にジャムを塗ります。ここで一旦冷蔵庫に入れて表面のジャムを固めておきます。
⑤一番下に大きな平皿、その上にクーリングラック、その上にスポンジケーキを乗せます。
⑤出来上がったチョコレートグレーズを最上段からかけます。パレットナイフで表面を平らにします。この時長い大きなパレットナイフがあれば一回で表面を平らにできますのできれいな仕上がりにあります(私は持ち合わせていませんので現在使用してしているもので妥協です)。
⑥平皿に落ちたグレーズは2度目のグレーズに使用できますし、コップに集めて冷蔵庫で固めて利用することもできます。ケーキを3時間ほど冷蔵庫で冷やせば完成です。
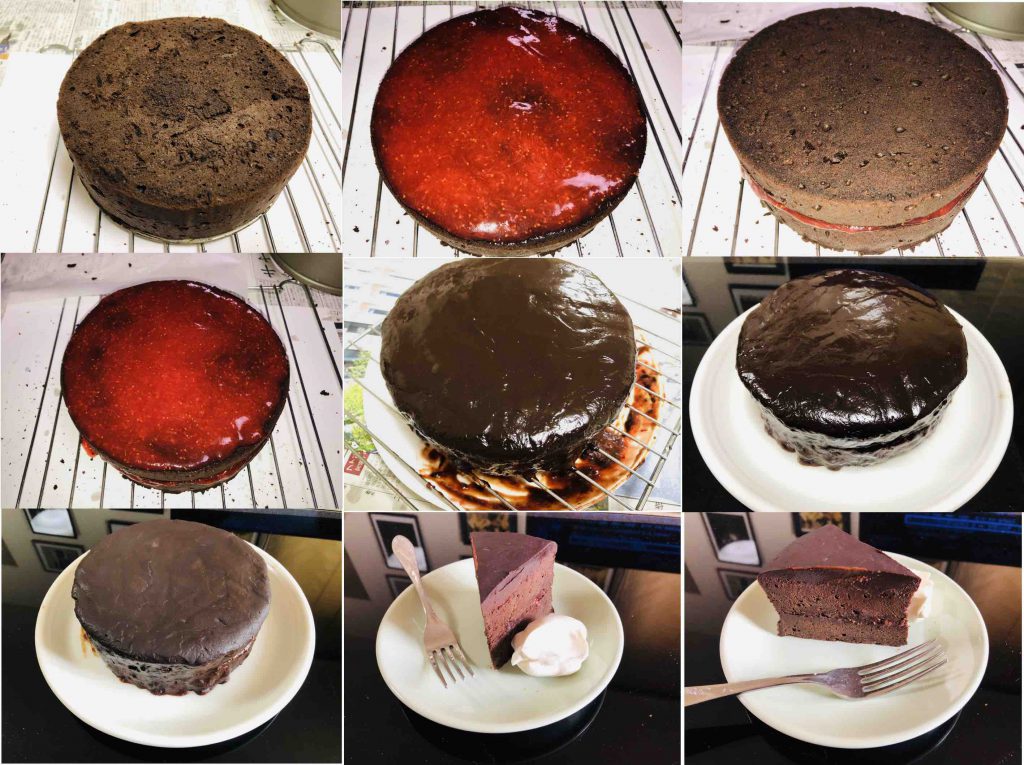
強烈にカカオが効いていますので、生クリームを添えました。
編集後記
大部分のダークチョコレート(スイート)の融点は30℃前後にありますので溶解温度は50℃くらいでゆっくり行うのが定石です。今回の85%カカオチョコレートは融点がどうやら40℃を超えているような印象でした(Bian-marieで溶解した際の感触です)。通常はドロドロに解けて再び硬くなる30℃あたりまでとろとろした状態が維持されますのでテンパーリングが素人でもそこそこに可能なのですが比熱の問題なのかよくわかりませんが温度変化に対する流動性が低下が大きすぎる印象でした(たぶんもともと融解した時点での流動性が低すぎるのだと思いますが?)。悠長にテーパーリングなどやってる暇もなく、実際グレーズした際の温度は?です。電子レンジでの溶解は、油断しているととんでもないことになることがあるのでやはりBain-marieが安全で確実だと思います。